Recently, we had the chance to visit SNSE Farmhouse and learn how to set up a vermicompost bin. Before going, we thought the process would be complicated, but it turned out to be simple and enjoyable.
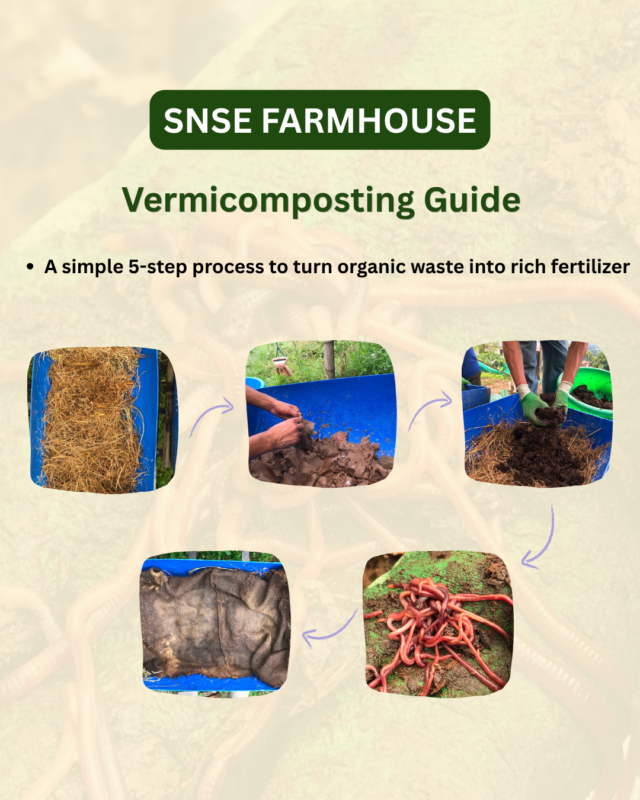
We began by preparing the base of the bin. We spread a layer of dry straw evenly across the bottom, which allows air to circulate from below and prevents water from collecting at the bottom. Next, we tore cardboard and paper into small pieces, soaked them thoroughly, and spread them over the straw. This carbon-rich layer holds the moisture that the worms need to breathe and stay healthy.
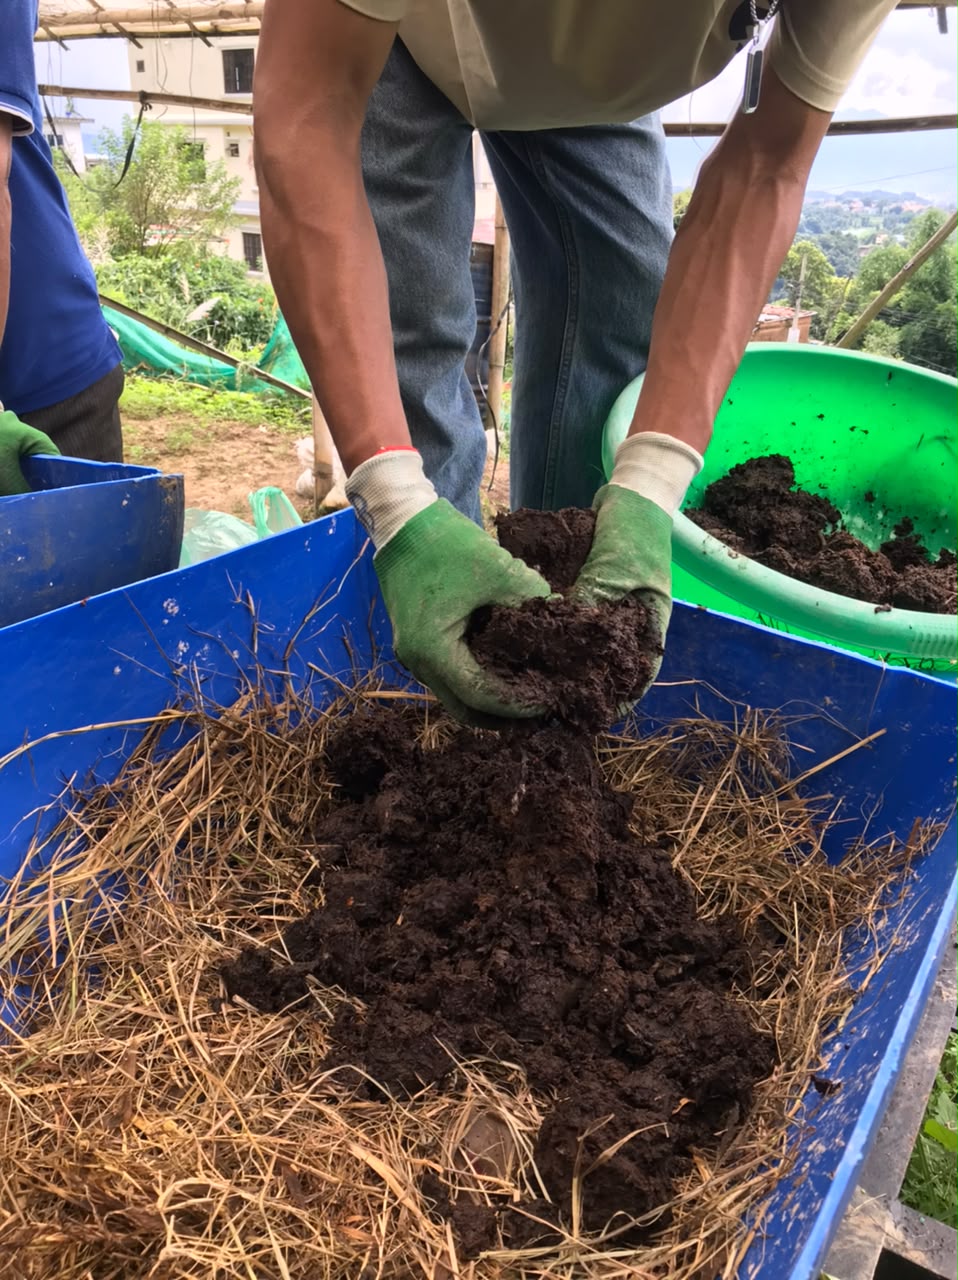
On top of that, we added a layer of aged cow manure and farm compost. This introduced beneficial microbes into the bin and gave the worms the grit they need to digest their food. Then came the best part of the day. We gently placed the Red Wrigglers onto the moist bedding, and almost immediately they burrowed down into the dark layers and began composting.
Finally, we covered the bin with a damp jute sack. The cover keeps the bin dark and humid, which is the environment worms prefer, while still letting air pass through. With that, our vermicompost bin was ready to turn organic waste into rich fertilizer. The experience showed us that vermicomposting does not need expensive equipment or complicated methods, only a few simple layers, some worms, and a little care.
Step-by-Step Summary
- Step 1: Bedding Base. Spread dry straw or hay evenly across the bottom of the bin. It allows bottom aeration and prevents excess water from collecting.
- Step 2: Carbon Layer. Add well-soaked shredded cardboard and paper over the straw. This layer holds the moisture worms need to breathe.
- Step 3: Organic Layer. Add aged cow manure and farm compost on top of the cardboard. It introduces beneficial microbes and provides grit for worm digestion.
- Step 4: Red Wrigglers. Gently release the worms onto the moist bedding. They burrow into the dark layers and begin composting.
- Step 5: Damp Cover. Cover the bin with a damp jute sack or burlap. It keeps the environment dark and humid while allowing airflow.
Ready for Compost!
Our vermicompost bin was set up and ready to produce rich organic fertilizer.